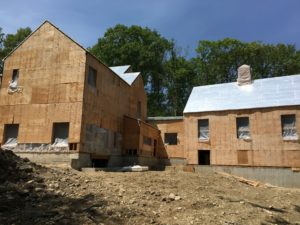
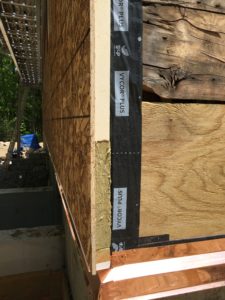
While the framers have been busy inside with interior rooms and stairs, we’ve started installing the exterior insulation. First up was the first of two layers of 2” rigid foam on the roof. Next are the walls: 2” of rigid polyisocyanurate foam attached to an OSB board, collectively called nailbase. We’ve ripped a foot of foam off the lowest course of nailbase so that we can replace it with a 2” thick piece of rigid rockwool board. This overlaps the sill and provides an insurance policy to make sure the sill can dry if it gets wet, because the rockwool has a much higher vapor permeability than the rigid foam. If we’d left the sill sandwiched between the closed cell spray foam on the interior and the rigid foam on the exterior, it might not be able to dry easily, but the rockwool gives the moisture a path to escape without compromising the insulation value or durability of the wall. A great reference for new innovations in building science is the Department of Energy’s Building America Solution Center, and there’s good info there about building durable and resilient structures. We don’t expect the sill to get wet – but if it does, this detail will help prevent problems.
Once the house is clad in the nailbase we’ll continue with the wall membrane, remaining roof rigid insulation and ice-and-water shield, and all the details and taping to make the envelope as airtight and waterproof as possible.